

What if you could have a deeply flavorful, fork-tender pot roast on your dinner table in under two hours — without hovering over the stove all day? If you’ve been searching for the ultimate Instant Pot Recipes that delivers rich, slow-cooked taste with a fraction of the effort, this Instant Pot Pot Roast is exactly what your weeknight dinner rotation has been missing. Packed with melt-in-your-mouth beef, hearty vegetables, and a savory herb-infused broth, this dish brings all the comfort of a Sunday roast into a Tuesday evening. It’s budget-friendly, beginner-approved, and absolutely irresistible.
Ingredients
Gathering the right ingredients is the first step toward a show-stopping pot roast. Here’s everything you’ll need to make this recipe serve 6 people generously:
-
- 3 to 4 lbs chuck roast — The best cut for this recipe. Chuck roast has enough fat marbling to become incredibly tender under pressure. You can substitute with brisket or bottom round, though chuck yields the best results.
-
- 2 tablespoons olive oil — Used for searing the meat to build a deep, caramelized crust. Avocado oil is an excellent substitute.
-
- 1 teaspoon salt — Essential for seasoning. Use kosher salt for better flavor distribution.
-
- 1 teaspoon black pepper
-
- 1 teaspoon garlic powder
-
- 1 teaspoon onion powder
-
- 1 teaspoon smoked paprika — Adds a subtle smoky depth that elevates the overall flavor profile.
-
- 1 large onion, roughly chopped
-
- 4 cloves garlic, minced
-
- 3 medium carrots, cut into 2-inch chunks — Baby carrots work just as well as a time-saving option.
-
- 4 medium Yukon Gold potatoes, quartered — Yukon Golds hold their shape better than russets under pressure. Red potatoes are another solid option.
-
- 2 stalks celery, sliced
-
- 1 cup beef broth — Use low-sodium broth to control salt levels. Bone broth adds extra richness and collagen.
-
- 1 tablespoon Worcestershire sauce — Adds a savory umami punch.
-
- 1 tablespoon tomato paste — Deepens the color and adds subtle acidity to balance the richness.
-
- 2 sprigs fresh rosemary
-
- 3 sprigs fresh thyme
-
- Optional: 1 tablespoon cornstarch + 2 tablespoons cold water — For thickening the gravy at the end.
-
- Optional: 1 cup mushrooms, sliced — Adds an earthy layer of flavor if you enjoy mushrooms in your roast.
Preparation & Cooking Time
Before you dive in, here’s a quick overview of what to expect time-wise so you can plan your meal accordingly:
-
- Preparation Time: 15 minutes
-
- Searing Time: 10 minutes
-
- Pressure Cooking Time: 60 minutes
-
- Natural Pressure Release: 15 minutes
-
- Total Time: Approximately 1 hour 40 minutes
-
- Servings: 6
-
- Difficulty Level: Easy to Intermediate
Even though the pressure cooking phase takes a full hour, the hands-on effort is minimal. The Instant Pot does the heavy lifting while you relax, set the table, or prepare a simple side salad. This is one of those recipes that genuinely feels like it takes all day but doesn’t. The natural pressure release is important — don’t skip it, as it helps the meat relax and retain its juices for maximum tenderness.
Step-by-Step Instructions
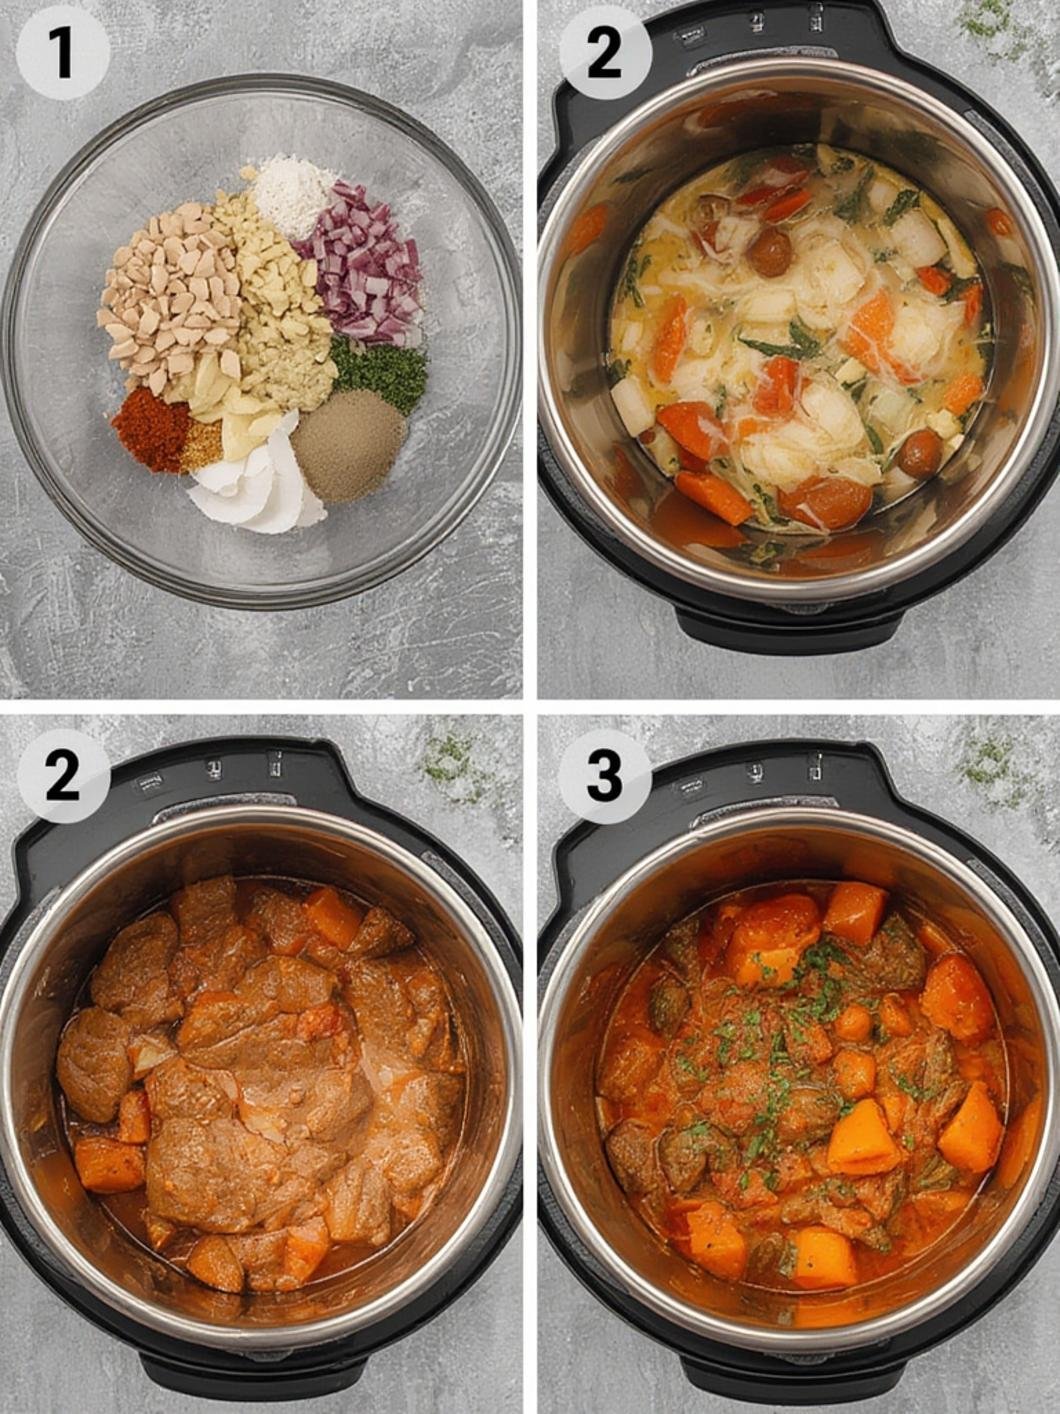
Step 1: Season the Roast
Pat your chuck roast completely dry with paper towels. This step is critical for achieving a proper sear. Combine salt, pepper, garlic powder, onion powder, and smoked paprika in a small bowl, then rub the spice mixture generously all over every surface of the meat. Allow it to sit at room temperature for about 10 minutes while you prep your vegetables.
Step 2: Sear the Meat
Set your Instant Pot to the Sauté function on High. Add olive oil and allow it to heat for about 1 to 2 minutes until shimmering. Carefully place the seasoned chuck roast into the pot. Sear each side for 3 to 4 minutes without moving it — you want a deep brown crust on all sides. This Maillard reaction is the secret to building complex, rich flavor in your final dish. Remove the roast and set it on a plate.
Step 3: Build the Base
Without cleaning the pot, add the chopped onion to the remaining drippings. Sauté for 2 to 3 minutes until softened. Add the minced garlic and cook for another 30 seconds. Stir in the tomato paste and Worcestershire sauce, scraping up any browned bits from the bottom of the pot — these caramelized bits are pure flavor gold and also prevent the burn warning. Pour in the beef broth and stir everything together.
Step 4: Add Remaining Ingredients
Nestle the seared chuck roast back into the Instant Pot. Tuck the rosemary and thyme sprigs alongside the meat. Layer the carrots, celery, and mushrooms (if using) around and on top of the roast. Do not add the potatoes yet — they’ll go in after a partial cook to prevent them from becoming mushy.
Step 5: First Pressure Cook Cycle
Secure the Instant Pot lid and set the valve to Sealing. Select Pressure Cook (Manual) on High Pressure and set the timer for 45 minutes. As one of the most beloved Instant Pot Recipes in the comfort food category, this two-stage cooking method ensures your potatoes stay perfectly intact while your beef becomes fall-apart tender. The Pressure cooker will take about 10 to 12 minutes to reach full pressure before the timer begins.
Step 6: Add the Potatoes
Once the first cycle is complete, perform a Quick Release carefully. Open the lid, add the quartered Yukon Gold potatoes, and press them gently into the broth. Secure the lid again, set the valve back to Sealing, and cook on High Pressure for an additional 15 minutes.
Step 7: Natural Pressure Release & Rest
When the second cook cycle finishes, allow the Instant Pot to naturally release pressure for 15 minutes, then carefully quick release any remaining pressure. Open the lid and transfer the roast to a cutting board. Let it rest for 5 minutes before shredding or slicing.
Step 8: Make the Gravy (Optional but Highly Recommended)
Switch the Instant Pot back to Sauté mode. Mix cornstarch with cold water to make a slurry and stir it into the remaining cooking liquid. Allow it to simmer for 3 to 5 minutes, stirring frequently, until the gravy reaches your desired consistency. Taste and adjust seasoning as needed.
Step 9: Serve and Enjoy
Arrange the shredded or sliced roast on a large serving platter surrounded by the vegetables. Ladle the rich, glossy gravy generously over the top. Garnish with fresh thyme or parsley for a restaurant-worthy presentation.
Nutrition & Health Benefits
This Instant Pot Pot Roast isn’t just delicious — it’s a genuinely nourishing meal that checks several nutritional boxes. Here’s an approximate breakdown per serving (based on 6 servings):
-
- Calories: 420–480 kcal
-
- Protein: 38–42g — Chuck roast is an excellent high-protein food that supports muscle repair, satiety, and sustained energy levels throughout the day.
-
- Carbohydrates: 22–26g — Primarily from potatoes and carrots, providing complex carbs and fiber for steady energy release.
-
- Fat: 18–22g — A moderate fat content, much of which comes from the natural marbling in the chuck roast. Trimming visible fat before cooking can reduce this figure.
-
- Iron: Beef is one of the richest dietary sources of heme iron, which is significantly more bioavailable than plant-based iron. Each serving provides approximately 20–25% of the daily recommended intake.
-
- Zinc: Supports immune function and is abundantly present in red meat.
-
- Vitamin B12: Essential for nerve health and red blood cell production, beef is one of the best natural sources.
-
- Potassium: Provided by both the potatoes and beef broth, potassium supports healthy blood pressure and cardiovascular function.
-
- Vitamin A: Carrots contribute significant beta-carotene, which the body converts to Vitamin A for eye health and immune support.
This dish is naturally gluten-free (provided you use gluten-free Worcestershire sauce and broth), making it an excellent option for those with gluten sensitivities. It is also dairy-free and can easily fit into a low-carb or paleo eating plan by simply omitting the potatoes and replacing them with additional non-starchy vegetables like parsnips or turnips.
Tips, Variations & Serving Suggestions
Pro Tips for Perfect Results:
-
- Never skip the searing step. It adds 80% of the flavor complexity to the final dish.
-
- Always deglaze the pot thoroughly after searing to prevent the dreaded Burn notice.
-
- For an even richer broth, use a combination of beef broth and red wine such as Cabernet Sauvignon or Merlot.
-
- Let the roast rest after cooking — just like a steak, resting allows the juices to redistribute throughout the meat.
Flavor Variations:
-
- Italian-Style: Add crushed tomatoes, Italian seasoning, and replace Worcestershire with balsamic vinegar for a Mediterranean twist.
-
- Spicy Southwest: Add cumin, chili powder, jalapeños, and a can of diced green chiles for a bold, smoky variation.
-
- Asian-Inspired: Replace the broth and herbs with soy sauce, ginger, star anise, and sesame oil for an Asian braised beef experience.
-
- Mississippi Pot Roast: Add a packet of ranch seasoning and a jar of pepperoncini peppers for the famous tangy, buttery variation that has gone viral for good reason.
Serving Ideas:
-
- Serve directly over creamy mashed potatoes for a double-comfort combination.
-
- Shred the beef and serve it in hoagie rolls with horseradish sauce for incredible pot roast sandwiches.
-
- Spoon over egg noodles with extra gravy for a hearty, satisfying pasta bowl.
-
- Pair with a simple green salad, crusty sourdough bread, or roasted Brussels sprouts.
Meal Prep Note: This recipe doubles beautifully. Make a larger batch and portion it into individual containers for easy weekday lunches or dinners throughout the week.
Common Mistakes to Avoid

1. Skipping the Sear
Many home cooks think they can skip searing to save time. While it won’t ruin the dish entirely, skipping this step results in a much flatter, less complex flavor. Take the extra 10 minutes — it’s always worth it.
2. Not Enough Liquid
The Instant Pot requires a minimum amount of liquid to build steam and reach pressure. Never use less than 1 cup of liquid. Insufficient liquid will trigger the Burn warning and prevent the pot from pressurizing correctly.
3. Overcrowding the Pot
If your roast is particularly large (over 4.5 lbs), consider cutting it in half before cooking. Overcrowding can result in uneven cooking and may prevent the lid from sealing properly.
4. Adding Potatoes Too Early
This is one of the most common mistakes beginners make. Potatoes break down much faster than beef under high pressure. Adding them at the beginning results in a mushy, unpleasant texture. Always add them in the second cooking cycle as outlined in this recipe.
5. Quick Releasing Too Early
Performing a quick release immediately after the cook cycle ends causes the meat fibers to tighten suddenly, resulting in a tougher texture. Always allow at least 10 to 15 minutes of natural pressure release when cooking large cuts of meat.
6. Not Deglazing the Pot After Searing
Those browned bits stuck to the bottom of the pot are full of flavor, but they’ll also trigger the Burn notice if not scraped up before pressure cooking begins. Always deglaze with broth or liquid immediately after sautéing.
7. Using the Wrong Cut of Beef
Lean cuts like sirloin or tenderloin are not suitable for this cooking method. They lack the connective tissue and fat needed to become tender under pressure. Stick with chuck roast, brisket, or short ribs for the best results.
Storage & Reheating Tips
Refrigerator Storage:
Allow the pot roast to cool completely before transferring to airtight containers. Store in the refrigerator for up to 4 days. Keep the meat submerged in its cooking liquid to prevent it from drying out.
Freezer Storage:
This recipe freezes exceptionally well. Portion cooled pot roast (with some gravy) into freezer-safe bags or containers, removing as much air as possible. Label with the date and freeze for up to 3 months. Thaw overnight in the refrigerator before reheating.
Reheating Methods:
-
- Stovetop: The best method for maintaining texture. Place the roast and gravy in a covered saucepan over medium-low heat, adding a splash of beef broth if needed. Heat gently for 10 to 15 minutes until warmed through.
-
- Microwave: Place in a microwave-safe dish with a bit of cooking liquid, cover loosely, and heat in 90-second intervals, stirring gently between each, until hot.
-
- Oven: Place in an oven-safe baking dish, cover tightly with foil, and reheat at 325°F (163°C) for 20 to 25 minutes.
Tip: Pot roast often tastes even better the next day as the flavors continue to develop and meld together overnight. It’s a genuinely great make-ahead meal.
Conclusion
There you have it — a complete, foolproof guide to making the most satisfying, restaurant-quality pot roast right in your own kitchen. This recipe proves that incredible flavor doesn’t require hours of active cooking or advanced culinary skills. With the right technique and a reliable Pressure cooker, you can transform an affordable cut of beef into something genuinely extraordinary. Whether you’re a seasoned home cook or just getting started, this dish belongs permanently in your weekly dinner rotation. Among all the Instant Pot Recipes you’ll ever try, a classic pot roast remains one of the most rewarding and crowd-pleasing options available. Now it’s your turn — fire up that Pressure cooker, gather your ingredients, and treat yourself and your family to something truly special tonight. Don’t forget to leave a comment below sharing how it turned out or any creative variations you tried!
FAQs
Q1: Can I use frozen chuck roast in the Instant Pot?
Yes, you can cook from frozen, but you’ll need to skip the searing step and increase the pressure cooking time by approximately 20 to 30 minutes. The result may be slightly less flavorful without the sear, but it’s still a convenient option when you forget to thaw in advance.
Q2: What size Instant Pot do I need for this recipe?
A 6-quart Instant Pot is the most commonly used size and works perfectly for a 3 to 4 lb roast with vegetables. If you’re cooking for a larger crowd or using a bigger roast, an 8-quart model provides more space and flexibility.
Q3: Can I make this recipe without potatoes?
Absolutely. Simply omit the potatoes for a lower-carb version, or substitute with turnips, parsnips, or cauliflower florets (added in the last 5 minutes only to prevent overcooking).
Q4: My pot roast came out tough. What went wrong?
A tough pot roast almost always means it needed more time. Unlike steaks where overcooking toughens the meat, braised cuts like chuck roast need sufficient time for the collagen to fully break down into gelatin. If your roast is tough, simply seal the pot and cook on High Pressure for an additional 15 to 20 minutes.
Q5: Can I add red wine to this recipe?
Yes, and it’s highly recommended for a deeper, more complex flavor. Replace half the beef broth with a dry red wine such as Cabernet Sauvignon, Merlot, or Burgundy. The alcohol cooks off during pressure cooking, leaving behind rich, sophisticated flavor notes.
Q6: Is this recipe gluten-free?
The recipe is naturally gluten-free provided you use gluten-free certified Worcestershire sauce and beef broth, as some commercial brands contain hidden gluten. Always check labels if you’re cooking for someone with celiac disease or a serious gluten intolerance.
Q7: Can I make this in a slow cooker instead?
Yes. Follow all steps through the searing and deglazing phase on the stovetop, then transfer everything to a slow cooker. Cook on Low for 8 to 10 hours or on High for 5 to 6 hours. Add potatoes in the final 2 hours of cooking to prevent them from becoming too soft.
| Recipe Card: Instant Pot Pot Roast | |
|---|---|
| Recipe Name | Instant Pot Pot Roast with Vegetables & Gravy |
| Cuisine | American / Comfort Food |
| Category | Dinner / Main Course |
| Prep Time | 15 minutes |
| Cook Time | 60 minutes (pressure cooking) + 10 minutes searing |
| Natural Release | 15 minutes |
| Total Time | Approximately 1 hour 40 minutes |
| Servings | 6 |
| Difficulty | Easy to Intermediate |
| Main Ingredient | Chuck Roast (3–4 lbs) |
| Calories per Serving | 420–480 kcal (approx.) |
| Protein per Serving | 38–42g |
| Carbohydrates per Serving | 22–26g |
| Fat per Serving | 18–22g |
| Dietary Info | Gluten-Free (with GF broth & Worcestershire), Dairy-Free |
| Equipment Needed | Instant Pot (6-qt or 8-qt), cutting board, sharp knife, tongs |
| Refrigerator Storage | Up to 4 days in an airtight container |
| Freezer Storage | Up to 3 months |
| Best Reheating Method | Stovetop over medium-low heat with a splash of beef broth |
| Serving Suggestions | Mashed potatoes, egg noodles, crusty bread, green salad |
| Key Flavor Profile | Savory, rich, herby, deeply umami with hints of smokiness |