
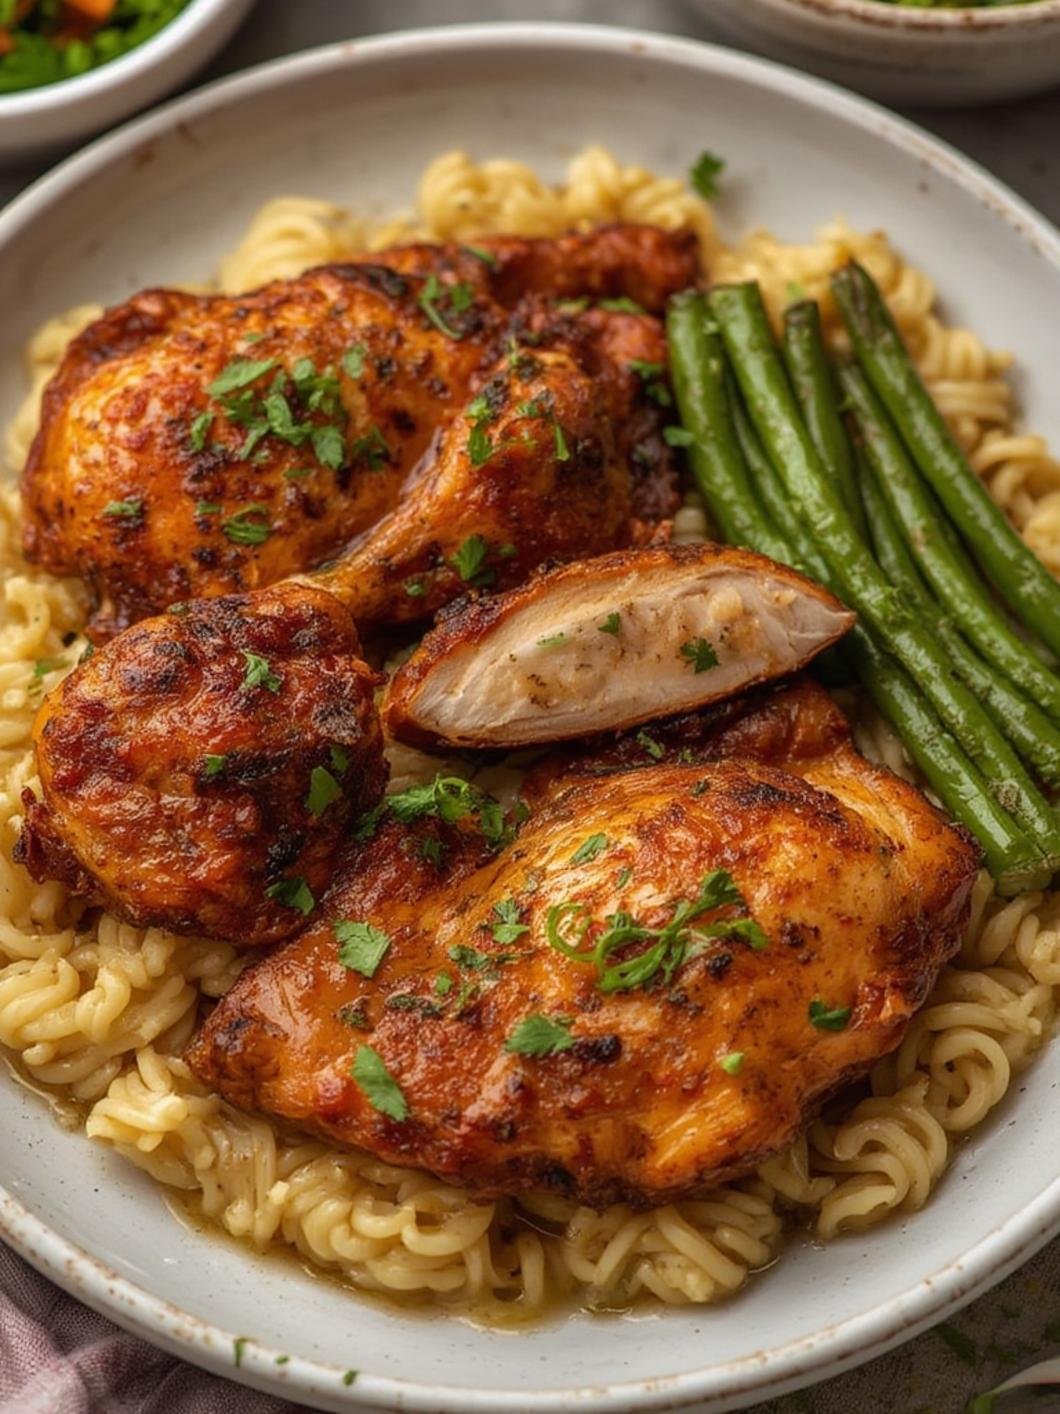
Ingredients
Gather the following ingredients before you begin. Having everything prepped and measured in advance will make the cooking process smooth and stress-free.
-
- 2 large boneless, skinless chicken breasts (approximately 6–8 oz each) – the star of the dish; look for even-thickness pieces for consistent cooking
-
- 2 tablespoons olive oil – helps create a beautiful sear and prevents sticking; avocado oil is a great high-heat substitute
-
- 1 tablespoon unsalted butter – adds richness and depth of flavor during basting
-
- 1 teaspoon garlic powder – for savory, aromatic depth
-
- 1 teaspoon smoked paprika – gives the chicken a gorgeous color and subtle smokiness
-
- 1 teaspoon onion powder – enhances the overall savoriness of the seasoning blend
-
- ½ teaspoon dried thyme or Italian seasoning – optional but highly recommended for herbaceous notes
-
- 1 teaspoon kosher salt – coarse salt works best for forming a flavorful crust
-
- ½ teaspoon freshly ground black pepper – adds mild heat and complexity
-
- 3 garlic cloves, smashed – used whole in the pan for fragrant, infused butter basting
-
- Fresh rosemary or thyme sprigs – optional for basting; adds a beautiful aromatic layer
-
- Fresh lemon wedges – optional for serving; brightens up the finished dish
Optional Substitutions: If you prefer a spicier profile, add ¼ teaspoon cayenne pepper to the spice blend. For a dairy-free version, skip the butter and use extra olive oil. Bone-in chicken thighs can be substituted for a richer, fattier alternative that works equally well in this recipe.
Preparation & Cooking Time
Before diving in, here is a quick overview of the time commitment and difficulty involved so you know exactly what to expect.
| Detail | Info |
|---|---|
| Preparation Time | 10 minutes |
| Cooking Time | 15–18 minutes |
| Resting Time | 5 minutes |
| Total Time | 30–33 minutes |
| Servings | 2 servings |
| Difficulty Level | Easy to Intermediate |
This recipe is approachable for beginner home cooks but has enough technique involved — like basting and resting — that even experienced cooks will appreciate the process. The most important thing to plan for is allowing your chicken to come to room temperature for at least 15 minutes before cooking. Cold chicken straight from the refrigerator cooks unevenly and often results in a dry exterior and undercooked interior. Giving yourself that extra buffer time before you even turn on the stove makes a measurable difference in the final result.
Step-by-Step Instructions
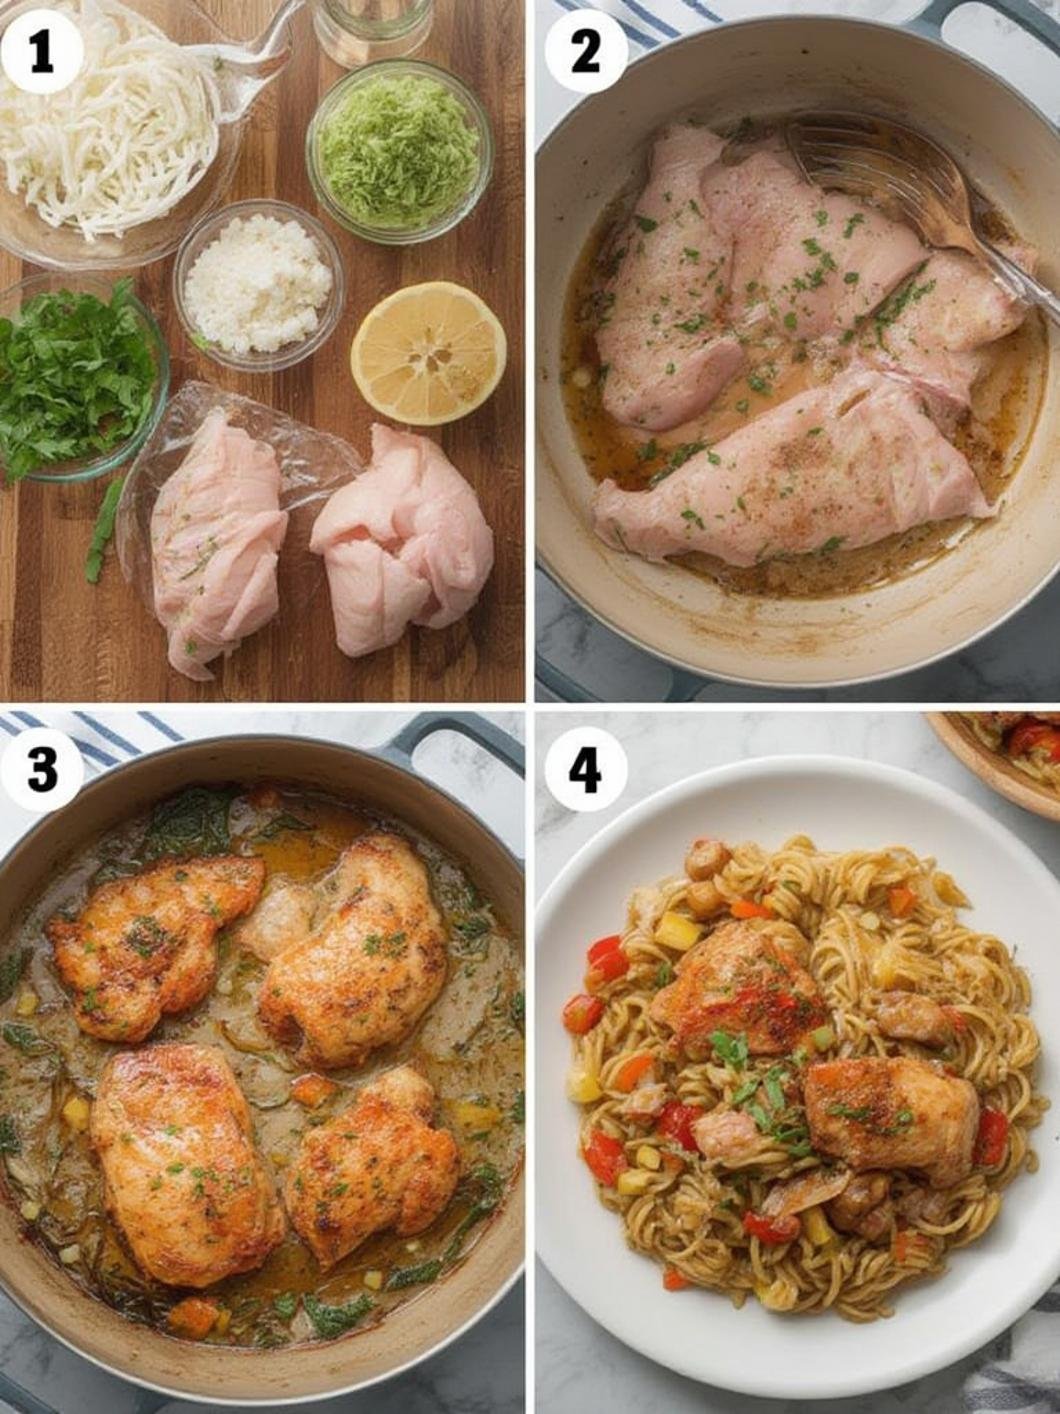
Follow these steps carefully for the juiciest, most perfectly seared chicken breast you have ever made at home.
Step 1: Prepare the Chicken
Remove the chicken breasts from the refrigerator 15–20 minutes before cooking and pat them completely dry with paper towels. Moisture on the surface of the meat is the number one enemy of a good sear. If the chicken breasts are very thick in the center, use a sharp knife to butterfly them slightly or pound them to an even thickness of about ¾ inch using a meat mallet. Even thickness ensures both sides cook at the same rate and eliminates the dreaded dry-edges-but-raw-center problem.
Step 2: Season Generously
In a small bowl, mix together the garlic powder, smoked paprika, onion powder, dried thyme, salt, and black pepper. Drizzle one tablespoon of olive oil over both sides of the chicken and rub it in gently. Then coat both sides evenly with the spice mixture, pressing gently so it adheres well. Do not be shy with the seasoning — chicken breast is a lean protein that benefits greatly from a bold spice rub.
Step 3: Preheat the Cast Iron Skillet
Place your Cast Iron Skillet on the stovetop over medium-high heat and let it preheat for 2–3 minutes. This is a critical step. Cast iron retains and distributes heat exceptionally well, but it needs time to reach a uniform temperature across the entire cooking surface. Add the remaining tablespoon of olive oil and swirl it around the pan. When the oil begins to shimmer and you see faint wisps of smoke, the pan is ready. Do not skip the preheating — dropping chicken into a cold pan will cause it to steam rather than sear.
Step 4: Sear the Chicken
Carefully lay the seasoned chicken breasts into the hot skillet, presentation side down. You should hear an immediate, aggressive sizzle — that is exactly what you want. Do not move or press down on the chicken. Let it cook undisturbed for 5–7 minutes. Resist the urge to peek or lift the chicken early. The chicken will naturally release from the pan when the crust has properly formed. If it sticks when you try to flip it, it simply needs more time. Once the bottom is a deep golden-brown, flip once using tongs.
Step 5: Butter Baste for Extra Flavor
After flipping, reduce the heat to medium. Add the butter, smashed garlic cloves, and fresh herb sprigs to the pan. As the butter melts, tilt the pan slightly and use a spoon to continuously baste the top of the chicken with the foaming, herb-infused butter. Mastering proper Cooking techniques like butter basting is what separates home cooks from professionals — it adds moisture, richness, and flavor simultaneously. Continue cooking and basting for another 5–7 minutes, or until the internal temperature reads 165°F (74°C) on an instant-read thermometer.
Step 6: Rest Before Slicing
Transfer the cooked chicken to a cutting board and let it rest for a full 5 minutes before slicing. Resting allows the internal juices to redistribute throughout the meat. Cutting into the chicken too early causes all those delicious juices to pour out onto the board rather than staying in the meat. After resting, slice against the grain and serve immediately.
Nutrition & Health Benefits
Chicken breast is one of the most nutritionally complete proteins you can cook at home. Here is a general nutritional breakdown per serving (one chicken breast, approximately 6 oz, cooked with the ingredients listed above):
| Nutrient | Amount Per Serving |
|---|---|
| Calories | ~320 kcal |
| Protein | ~42g |
| Total Fat | ~14g |
| Saturated Fat | ~3.5g |
| Carbohydrates | ~2g |
| Fiber | ~0.3g |
| Sodium | ~520mg |
| Cholesterol | ~120mg |
| Vitamin B6 | ~85% DV |
| Niacin (B3) | ~70% DV |
| Phosphorus | ~35% DV |
| Selenium | ~55% DV |
Health Highlights: Chicken breast is naturally low in carbohydrates, making it an excellent choice for those following low-carb, keto, or paleo diets. Its remarkably high protein content supports muscle repair and growth, making this recipe ideal for athletes and fitness enthusiasts. The smoked paprika in the spice blend contains capsaicin, which has been associated with anti-inflammatory benefits. Olive oil provides heart-healthy monounsaturated fats, while fresh herbs like thyme and rosemary are rich in antioxidants. This dish is also naturally gluten-free, making it safe for those with celiac disease or gluten sensitivity. If you are watching sodium intake, simply reduce the salt to ½ teaspoon without compromising the overall flavor significantly.
Tips, Variations & Serving Suggestions
Pro Tips for Best Results:
-
- Always use a meat thermometer. Guessing doneness by time alone leads to inconsistent results.
-
- Allow the skillet to fully preheat before adding oil or chicken. A properly preheated surface is non-negotiable for a great sear.
-
- Use a splatter screen while searing to keep your stovetop clean without compromising the cooking process.
-
- For extra juicy results, brine the chicken for 30 minutes in saltwater (1 tablespoon salt per 2 cups water) before seasoning.
Flavor Variations:
-
- Lemon Herb: Add lemon zest to the spice rub and finish with a squeeze of fresh lemon juice after cooking.
-
- Cajun Style: Replace the spice blend with a bold Cajun seasoning mix and add a pinch of cayenne for heat.
-
- Honey Garlic Glaze: In the last 2 minutes of cooking, drizzle 1 tablespoon of honey over the chicken for a beautiful caramelized glaze.
-
- Italian Herb: Use Italian seasoning generously and finish with a pan sauce made from chicken broth, sun-dried tomatoes, and fresh basil.
Alternative Cooking Methods:
-
- Oven Finish: Sear on the stovetop for 3 minutes per side, then transfer the entire skillet to a 400°F oven for 10–12 minutes to finish cooking. This is ideal for thicker cuts.
-
- Air Fryer: Cook at 375°F for 18–20 minutes, flipping halfway through. Great for a hands-off approach.
-
- Grill: Marinate the chicken for 30 minutes and grill over medium-high heat for 6–7 minutes per side.
Serving Ideas: Pair with roasted garlic mashed potatoes, steamed green beans, or a crisp garden salad for a well-rounded meal. A creamy mushroom sauce or chimichurri drizzled over the top elevates the dish dramatically. For a lighter meal, slice the chicken and serve over mixed greens with a lemon vinaigrette. It also works beautifully sliced into a warm sandwich with avocado, arugula, and honey mustard.
Common Mistakes to Avoid

1. Not Drying the Chicken Before Cooking
Wet chicken will steam in the pan rather than sear. Always pat thoroughly dry with paper towels. This step only takes 30 seconds but dramatically affects the crust quality.
2. Cooking Cold Chicken Straight from the Refrigerator
Cold meat contracts in the heat, resulting in uneven cooking and a tough texture. Let the chicken rest at room temperature for at least 15 minutes before it touches the pan.
3. Moving the Chicken Too Early
Many beginners try to flip the chicken before the crust has formed, causing it to tear and stick. Be patient. A properly seared chicken breast will release naturally from the pan when it is ready to flip.
4. Cooking on High Heat the Entire Time
Starting on medium-high heat for the sear and reducing to medium for the butter basting phase is intentional. Keeping the heat on high throughout will burn the butter, over-brown the outside, and leave the inside undercooked.
5. Skipping the Resting Period
This is perhaps the most common mistake of all. Slicing chicken immediately after cooking causes all the internal moisture to escape. Five minutes of resting makes an enormous difference in juiciness and overall quality.
6. Not Using a Thermometer
Visual cues alone are unreliable for chicken. The only foolproof way to know the chicken is cooked safely and perfectly is to use an instant-read thermometer targeting an internal temperature of 165°F (74°C).
7. Under-Seasoning
Chicken breast is a relatively mild protein that needs bold seasoning to shine. Do not be afraid of using a generous spice rub — remember that most of that seasoning forms the exterior crust and does not penetrate deeply into the meat.
Storage & Reheating Tips
Refrigerator Storage: Allow cooked chicken to cool to room temperature (no longer than 2 hours). Store in an airtight container in the refrigerator for up to 4 days. To preserve moisture, store the chicken whole rather than sliced and keep any pan juices or drippings in the same container.
Freezer Storage: Cooked chicken breast freezes well for up to 3 months. Wrap each piece individually in plastic wrap, then place in a zip-top freezer bag with as much air removed as possible. Label with the date. Thaw overnight in the refrigerator for best results.
Reheating Methods:
-
- Stovetop (Recommended): Add a splash of chicken broth or water to a skillet over medium-low heat. Cover and heat for 3–5 minutes until warmed through. This method best preserves moisture.
-
- Oven: Place chicken in a baking dish, add a small splash of broth, cover tightly with foil, and reheat at 325°F for 10–15 minutes.
-
- Microwave: Place on a microwave-safe plate, cover with a damp paper towel, and heat in 30-second intervals. Quick and convenient, though it slightly reduces texture quality.
-
- Air Fryer: Reheat at 350°F for 4–5 minutes for a surprisingly crispy result without drying out.
Meal Prep Note: This recipe is excellent for weekly meal prep. Cook 4–6 chicken breasts on Sunday and store them for use throughout the week in salads, sandwiches, grain bowls, pasta dishes, or wraps. The flavor holds beautifully for days.
Conclusion
There is truly nothing more satisfying than pulling a perfectly seared, golden-crusted chicken breast out of a Cast Iron Skillet — juicy on the inside, beautifully caramelized on the outside, and packed with bold, herb-infused flavor. This recipe proves that home cooking does not need to be complicated to be extraordinary. With the right ingredients, a well-seasoned pan, and the proper Cooking techniques outlined in this guide, you will consistently produce restaurant-quality results in your own kitchen. Whether you are cooking for yourself, your family, or entertaining guests, this recipe deserves a permanent place in your weekly rotation. Now it is your turn — give this recipe a try this week, share your results in the comments below, and do not forget to explore our other cast iron recipes for even more delicious inspiration. You have everything you need to make this your new favorite go-to dinner.
Recipe Card
| Cast Iron Skillet Chicken Breast — Recipe Card | |
|---|---|
| Recipe Name | Cast Iron Skillet Chicken Breast |
| Prep Time | 10 minutes |
| Cook Time | 15–18 minutes |
| Rest Time | 5 minutes |
| Total Time | 30–33 minutes |
| Servings | 2 |
| Difficulty | Easy to Intermediate |
| Calories Per Serving | ~320 kcal |
| Main Ingredients | Chicken breast, olive oil, butter, smoked paprika, garlic powder, onion powder, thyme, salt, pepper, garlic cloves |
| Cooking Method | Stovetop sear + butter basting |
| Dietary Info | Gluten-free, Low-Carb, High-Protein, Keto-Friendly |
| Internal Temperature | 165°F / 74°C |
| Storage | Refrigerator: 4 days | Freezer: 3 months |
| Best Served With | Mashed potatoes, roasted vegetables, salad, grain bowls |
FAQs
Q1: Can I use a regular non-stick pan instead of a cast iron skillet?
Yes, you can use a non-stick or stainless steel pan, but results will differ. Cast iron retains heat more evenly and reaches higher surface temperatures, which creates a superior sear and crust. A regular pan will still work but may not produce the same depth of color or flavor on the exterior of the chicken.
Q2: How do I know when the chicken breast is fully cooked without a thermometer?
While a meat thermometer is strongly recommended for accuracy and food safety, you can check doneness by cutting into the thickest part of the breast. The meat should be completely white with no pink, and the juices should run clear. However, this method is less reliable and can cause you to lose valuable moisture from the interior.
Q3: Can I use bone-in chicken breasts for this recipe?
Absolutely. Bone-in chicken breasts work wonderfully with this technique, though they require additional cooking time — approximately 25–35 minutes total, with a 5-minute stovetop sear followed by a 20–25 minute finish in a 400°F oven. Always verify with a thermometer before serving.
Q4: Why did my chicken breast turn out dry and rubbery?
The most common cause is overcooking. Chicken breast dries out quickly above 165°F. Other contributing factors include not resting the meat before slicing, cooking cold chicken directly from the fridge, or using a pan that was not hot enough before adding the chicken. Following all the steps in this guide should help you avoid these issues.
Q5: Can I marinate the chicken overnight before using this recipe?
Yes, marinating overnight adds excellent flavor depth. A simple marinade of olive oil, lemon juice, garlic, and herbs works beautifully. If you marinate the chicken, pat it very dry with paper towels before searing to ensure you still achieve a proper golden crust rather than steaming the meat.
Q6: Is this recipe suitable for meal prepping multiple servings?
Absolutely. This recipe scales up effortlessly. Simply cook multiple chicken breasts in batches, making sure not to overcrowd the pan — overcrowding lowers the pan temperature and causes steaming. Store cooked and cooled chicken in airtight containers in the refrigerator for up to four days for a week of quick, protein-packed meals.
Q7: Can I add a sauce directly to the pan after cooking the chicken?
Yes, and it is highly recommended. After removing the chicken to rest, deglaze the hot pan with ½ cup of chicken broth, white wine, or heavy cream, scraping up all the flavorful browned bits from the bottom. Stir in a tablespoon of butter and let it reduce for 2–3 minutes to create a quick, elegant pan sauce to drizzle over the finished chicken.
“`