
There’s something incredibly satisfying about making your own easy refrigerator pickles at home – and with this easy refrigerator pickle recipe, you can have crisp, tangy, flavorful pickles ready to enjoy in just 24 hours. No canning equipment, no complicated steps, no hot water baths. Just fresh cucumbers, a simple brine, and your refrigerator.
I used to think making pickles required a full canning setup and hours of work. Then I discovered refrigerator pickles – and everything changed. This method is so simple that anyone can do it. Just pack your favorite vegetables in a jar, pour over a quick brine, and let the fridge do the work. The result is crisp, vibrant pickles that taste far better than anything from a store shelf.
This recipe is perfect for beginners or anyone who wants fresh pickles without the fuss. You can use any vegetables you have on hand – cucumbers, carrots, green beans, or even cauliflower. The brine is tangy, slightly sweet, and packed with garlic and dill. In just 24 hours, you’ll have delicious homemade pickles that are perfect for snacking, sandwiches, or sharing.
What Are Refrigerator Pickles?
Refrigerator pickles are pickles that are made by soaking fresh vegetables in a vinegar‑based brine and storing them in the refrigerator, rather than processing them in a hot water bath for long‑term shelf storage. They’re quick, easy, and require no special equipment. Unlike canned pickles, refrigerator pickles retain a fresher, crisper texture and are ready to eat in as little as 24 hours. They keep in the fridge for up to a month.
Why They’re a Kitchen Favorite
Refrigerator pickles are loved for their simplicity, speed, and incredible freshness. They’re perfect for beginners, require no canning equipment, and can be customized with any vegetables or spices you like. Plus, they’re far more affordable and flavorful than store‑bought pickles.
Flavor & Texture Profile
- Flavor: Tangy, garlicky, and perfectly balanced – the brine can be customized to be sweet, spicy, or traditional dill.
- Texture: Crisp, crunchy, and fresh – refrigerator pickles stay firmer than canned pickles.
- Aroma: Fresh and aromatic – the scent of vinegar, garlic, dill, and pickling spices fills the kitchen.

Why You’ll Love This Recipe
- Ready in 24 Hours: Quicker than canning – just 24 hours and they’re ready to enjoy.
- No Canning Equipment: Just a jar and your refrigerator – no special tools needed.
- Simple Ingredients: Just vinegar, water, salt, sugar, and your favorite vegetables and spices.
- Endlessly Customizable: Use any vegetables and any spices you like – make it your own.
- Perfectly Crunchy: Refrigerator pickles stay fresher and crunchier than canned versions.
- Budget‑Friendly: Making your own pickles is far more affordable than buying gourmet jars.
- Great for Gifting: Homemade pickles in beautiful jars make wonderful homemade gifts.
Ingredients
For the Pickles
- Pickling cucumbers – 1½ pounds (Kirby or Persian cucumbers, about 6‑8 small)
- Fresh dill – 1 large bunch (or 1 tablespoon dill seeds)
- Garlic cloves – 4‑6 (peeled and lightly smashed)
- Optional add‑ins: sliced onion, jalapeños, red pepper flakes, or other vegetables
For the Brine
- White vinegar (5% acidity) – 1 cup
- Water – 1 cup
- Pickling salt or kosher salt – 1 tablespoon
- Granulated sugar – 1 tablespoon (optional, for a sweet‑tangy flavor)
- Dill seeds – 1 teaspoon (optional, for extra dill flavor)
- Black peppercorns – 1 teaspoon
- Mustard seeds – 1 teaspoon
- Red pepper flakes – ½ teaspoon (optional, for heat)
Premium Ingredient Options

- Cucumbers: Use pickling varieties like Kirby or Persian cucumbers – they hold their shape and crunch better than regular slicing cucumbers.
- Salt: Pickling salt is best because it has no anti‑caking agents that could cloud the brine.
- Vinegar: Use 5% acidity vinegar for the best flavor and preservation.
- Dill: Fresh dill is ideal for the best flavor – use both the fronds and the stems.
Budget Alternatives
- Use regular cucumbers if pickling cucumbers aren’t available – slice them thin and remove any large seeds.
- Use kosher salt instead of pickling salt.
- Use dried dill if fresh isn’t available – use 1 tablespoon of dill seeds or dried dill weed.
Common Ingredient Mistakes
- Using table salt: Table salt often contains iodine and anti‑caking agents that can make the brine cloudy.
- Using waxy cucumbers: Grocery store cucumbers are often waxed – wash them thoroughly and scrub to remove the wax.
- Not trimming the blossom end: The blossom end contains an enzyme that can cause softening – trim ⅛ inch from the ends.
Ingredient Substitutions
- No pickling salt: Use kosher salt – it’s similar and doesn’t contain iodine.
- No fresh dill: Use 1 tablespoon of dill seeds or dried dill weed.
- No white vinegar: Use apple cider vinegar for a milder, slightly fruitier flavor.
- No mustard seeds: Omit or use ½ teaspoon of dry mustard.
- No sugar: Omit for a traditional dill pickle.
Equipment
Essential Tools
- Large glass jar or container with a tight‑fitting lid (32‑ounce or larger)
- Small saucepan (for making the brine)
- Chef’s knife and cutting board
- Measuring cups and spoons
- Funnel (for easy pouring)
Optional Tools
- Mandoline slicer (for even, uniform slices)
- Glass weights (to keep vegetables submerged)
Step‑by‑Step Instructions

- Prep the Vegetables
Wash the cucumbers thoroughly, scrubbing away any dirt. Trim ⅛ inch from the blossom end (the end opposite the stem) – this contains an enzyme that can cause softening. Slice the cucumbers into spears, chips, or leave them whole (if using small cucumbers).
Visual cue: The cucumbers should be fresh, firm, and free of soft spots.
Pro tip: For the crunchiest pickles, use cucumbers that were picked within 24 hours. - Pack the Jar
In a clean glass jar, place a generous amount of fresh dill, 4‑6 smashed garlic cloves, and any other spices you’re using (peppercorns, mustard seeds, red pepper flakes). Pack the cucumbers tightly into the jar, leaving about ½ inch of headspace at the top. If using spears, pack them vertically. If using chips, stack them snugly.
Visual cue: The jar should be filled with vegetables up to the neck, leaving room for the brine.
Pro tip: For extra flavor, layer the vegetables with additional dill and garlic as you pack. - Make the Brine
In a small saucepan, combine the vinegar, water, salt, and sugar (if using). Bring to a boil over medium heat, stirring occasionally, until the salt and sugar are fully dissolved – about 3‑5 minutes. Remove from heat and let the brine cool for 5‑10 minutes – it should be warm but not boiling when you pour it over the vegetables.
Aroma cue: The sharp, clean scent of vinegar and spices will fill your kitchen.
Pro tip: Pouring hot brine over the vegetables helps them pickle faster, but pouring cold brine (refrigerated) can preserve even more crunch. - Pour the Brine
Pour the warm brine over the packed vegetables, completely covering them and leaving ½ inch of headspace at the top. Use a butter knife or chopstick to gently remove any air bubbles by running it along the inside of the jar.
Visual cue: The brine should completely cover the vegetables – if any are sticking up, push them down. - Cool and Refrigerate
Let the jar cool to room temperature (about 30 minutes), then cover with the lid and place in the refrigerator. The pickles will start to develop flavor within a few hours, but for the best flavor, let them sit for at least 24 hours before enjoying.
Pro tip: The longer they sit, the more the flavors will meld – they’ll continue to improve over the next few days. - Enjoy
After 24 hours, your pickles are ready to enjoy! They’ll keep in the refrigerator for up to 1 month (though they rarely last that long). Serve chilled and enjoy the satisfying crunch!
Visual cue: The pickles should be a vibrant green color with a crisp, firm texture.
Expert Chef Tips
For the Perfect Refrigerator Pickles
- Use Fresh, Firm Cucumbers: The fresher the cucumbers, the crispier your pickles will be. Look for firm, unwrinkled cucumbers with no soft spots.
- Trim the Blossom End: The blossom end contains an enzyme that can cause softening – trim ⅛ inch from the ends.
- Add Grape Leaves or Oak Leaves: Adding a grape leaf or oak leaf to each jar helps keep pickles crisp – the tannins in the leaves prevent softening.
- Chill for 24 Hours: For the best flavor and crunch, let the pickles sit in the refrigerator for at least 24 hours before serving.
- Keep Them Submerged: To keep the pickles fully covered in brine, place a glass weight or a crumpled piece of parchment paper directly on the surface of the pickles.
Flavor Balancing
- Tanginess: The vinegar provides the tangy backbone – adjust the ratio of vinegar to water to suit your taste.
- Saltiness: The salt balances the vinegar and enhances the flavor – don’t skip it.
- Garlic: Fresh garlic adds a pungent, savory depth – use as much or as little as you like.
- Dill: Fresh dill provides the signature flavor – use both the fronds and the stems for the best results.
- Sweetness: Sugar balances the vinegar and adds a subtle sweetness – adjust or omit to taste.
Texture Improvement Tips
- Use Whole or Spear Cut: Whole or spear‑cut pickles stay crunchier than sliced pickles – the skin helps maintain their structure.
- Add Tannins: Grape leaves, oak leaves, or a tea bag added to the jar release tannins that help keep pickles crisp.
- Use Cold Brine: Pouring cold brine over the vegetables can help preserve even more crunch.
Cooking Science
Salt draws out moisture from the cucumbers through osmosis, creating a crisp texture. The acidity of the vinegar (which lowers the pH) creates an environment that preserves the pickles and prevents spoilage. The combination of garlic, dill, and spices infuses the brine with flavor, and over time, the cucumbers absorb these flavors. Refrigerator pickles don’t undergo the heat processing of canned pickles, so they retain more of their fresh, crunchy texture.
Troubleshooting
- Pickles are soft or mushy – You may have used cucumbers that weren’t fresh, skipped trimming the blossom end, or used too‑soft water. Use fresh, firm cucumbers, trim the ends, and use filtered water if your tap water is high in minerals.
- Pickles are too salty – Reduce the salt in the brine by ½ tablespoon next time.
- Pickles are too tangy – Reduce the vinegar ratio or add a little more water next time.
- Brine is cloudy – This can happen if you used table salt with anti‑caking agents. Use pickling salt or kosher salt next time.
- Not enough flavor – Let the pickles sit for 48‑72 hours – the flavors intensify over time. You can also add more garlic or spices.
- Pickles taste bland – Add more salt or vinegar to the brine next time – taste the brine before pouring it over the vegetables.
Recipe Variations
Classic Dill Refrigerator Pickles
Follow the recipe as written – it’s the perfect savory, garlicky, dill‑forward pickle.
Sweet Refrigerator Pickles
Add ½ cup of sugar to the brine for a sweet‑tangy bread and butter style.
Spicy Refrigerator Pickles
Add ½‑1 teaspoon of crushed red pepper flakes or a few sliced jalapeños to the jar for a spicy kick.
Garlic Refrigerator Pickles
Double the garlic – add 8‑10 cloves to the jar for extra garlicky flavor.
Bread and Butter Refrigerator Pickles
Add sliced onions to the jar and use a sweet brine (increase sugar to ½ cup) for a classic bread and butter flavor.
Mixed Vegetable Refrigerator Pickles
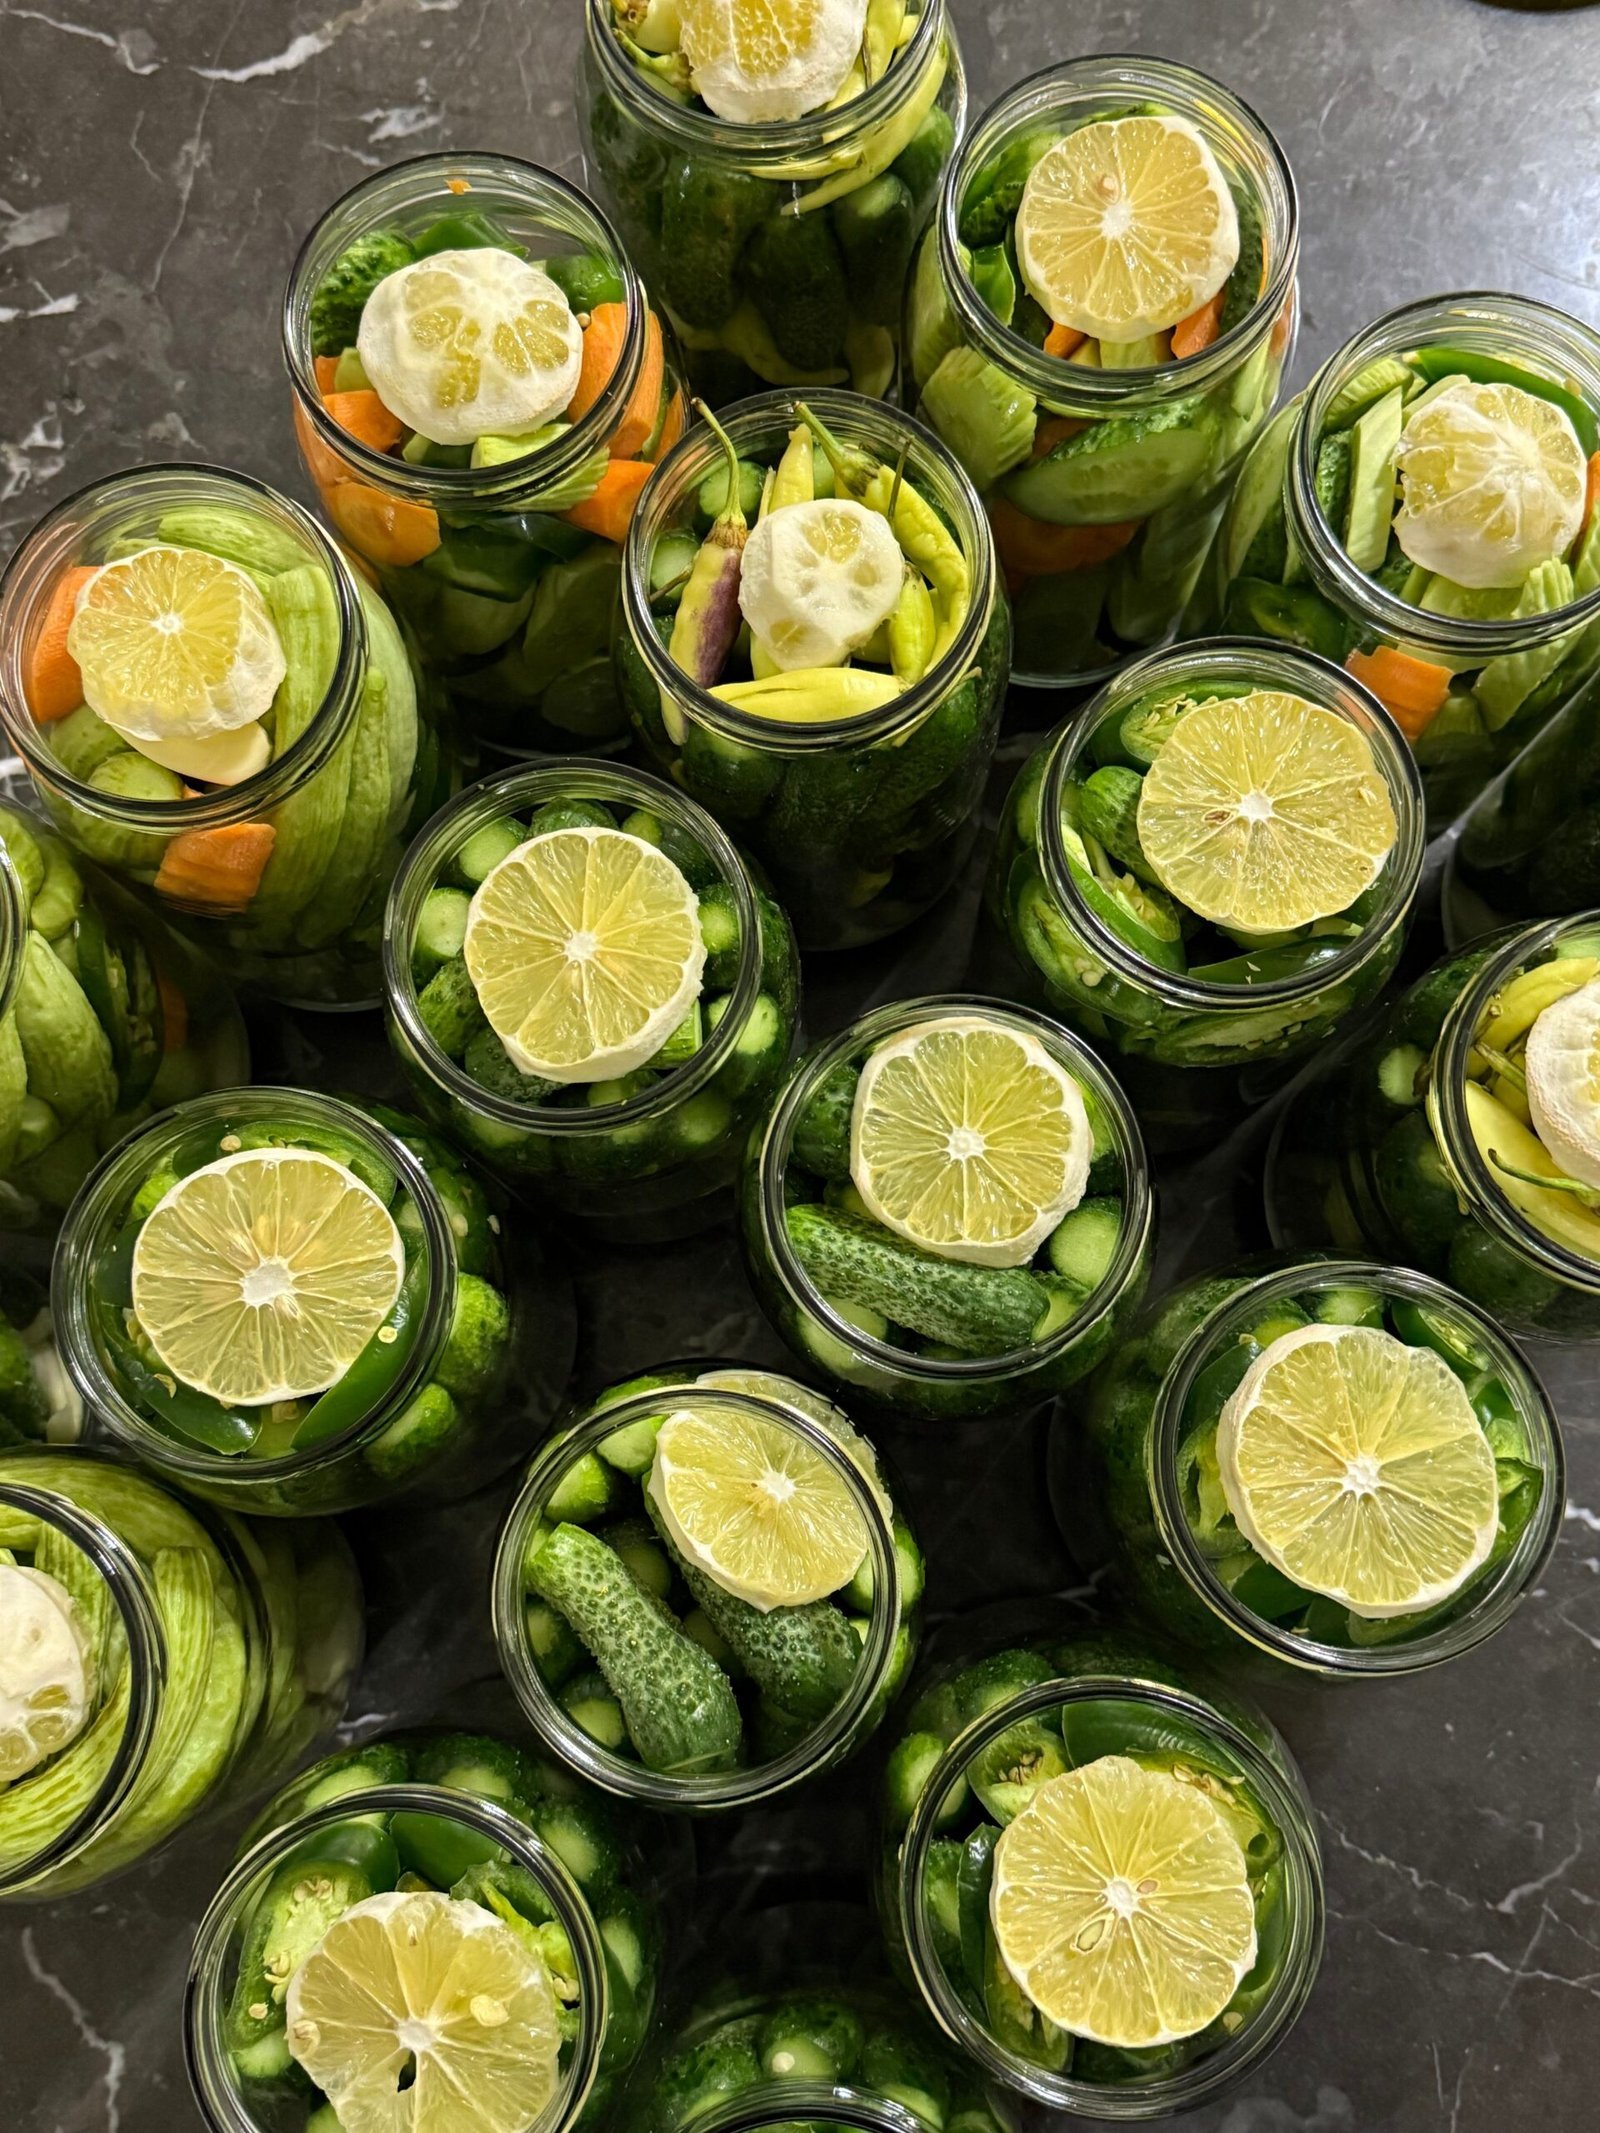
Use a mix of cucumbers, carrots, cauliflower, and bell peppers for a colorful variety.
Serving Suggestions
Classic Pairings
Burgers, sandwiches, hot dogs, and deli platters. Dill pickles are a classic addition to any sandwich or burger.
Cheese Boards
Pair with sharp cheddar, aged gouda, or creamy brie – the tangy pickles cut through the richness of cheese.
Salads and Relishes
Chop them up for potato salad, tuna salad, or chicken salad. They add a pop of tang and crunch.
Snacking
Enjoy them straight from the jar – they’re a delicious, low‑calorie snack.
Storage & Shelf Life
Refrigerator Pickles
Store in the refrigerator for up to 1 month. The pickles will continue to develop flavor over time – they’re best after 24‑48 hours.
Freezing
Pickles don’t freeze well – the texture becomes soft and watery. For long‑term storage, water‑bath canning is the best method.
FAQ
How long do refrigerator pickles take to be ready?
Refrigerator pickles are ready to eat in as little as 24 hours, but they develop even more flavor over the next 3‑5 days. For the best flavor, wait 48‑72 hours before serving.
How long do refrigerator pickles last?
Refrigerator pickles will keep in the refrigerator for up to 1 month. They will continue to develop flavor over time – the texture may soften slightly after a few weeks.
Do I need to can refrigerator pickles?
No – refrigerator pickles are designed to be stored in the refrigerator without any canning process. They are not shelf‑stable and must be kept refrigerated.
What kind of cucumbers should I use?
Pickling varieties like Kirby or Persian cucumbers are best – they hold their shape and crunch better than regular slicing cucumbers. If you use regular cucumbers, choose small, firm ones and remove any large seeds.
Can I use other vegetables?
Absolutely – carrots, cauliflower, green beans, bell peppers, and onions all work beautifully. Just slice them into bite‑sized pieces and pack them in the jar.
Can I reuse the brine?
It’s not recommended to reuse the brine for another batch of pickles – the acidity and flavor levels will be depleted.
Why are my pickles soft?
Soft pickles usually happen when the cucumbers weren’t fresh, the blossom end wasn’t trimmed, or they were over‑exposed to heat. Use fresh, firm cucumbers and store them in the refrigerator.
Can I adjust the salt and vinegar?
Yes – adjust the salt and vinegar to your taste. A good starting point is a 1:1 ratio of vinegar to water with 1 tablespoon of salt per cup of liquid.
Can I make these pickles spicy?
Yes – add crushed red pepper flakes, sliced jalapeños, or a pinch of cayenne pepper to the jar for heat.
What is the best vinegar for pickles?
White vinegar (5% acidity) is the most common choice – it provides a clean, sharp tang. Apple cider vinegar can be used for a milder, slightly fruitier flavor.
Nutrition (estimated per serving – ¼ cup)
- Calories: 5‑10
- Protein: 0g
- Carbohydrates: 1‑2g
- Fat: 0g
- Fiber: 0‑1g
- Sugar: 0‑1g
- Sodium: 300‑500mg
Note: Nutrition values are estimates and may vary based on specific ingredients, portion sizes, and cooking methods.
Recipe Card
| Easy Refrigerator Pickles – Quick & Crunchy Homemade Pickles | |
| Cuisine | American |
| Course | Condiment / Side |
| Prep Time | 10 minutes |
| Cook Time | 5 minutes |
| Total Time | 15 minutes (plus 24 hours chilling) |
| Servings | Makes 1 jar (about 2 cups) |
| Calories | 5‑10 per ¼ cup |
Ingredients

- 1½ pounds pickling cucumbers (Kirby or Persian), whole or cut into spears
- 1 large bunch fresh dill (or 1 tablespoon dill seeds)
- 4‑6 garlic cloves (peeled and smashed)
- 1 cup white vinegar (5% acidity)
- 1 cup water
- 1 tablespoon pickling salt or kosher salt
- 1 tablespoon granulated sugar (optional)
- 1 teaspoon dill seeds (optional)
- 1 teaspoon black peppercorns
- 1 teaspoon mustard seeds
- ½ teaspoon red pepper flakes (optional)
Instructions
- Wash cucumbers, trim ⅛ inch from the blossom end, and cut as desired.
- In a clean jar, place dill, garlic, peppercorns, mustard seeds, and red pepper flakes (if using).
- Pack cucumbers tightly into the jar, leaving ½ inch headspace.
- In a small saucepan, combine vinegar, water, salt, and sugar (if using). Bring to a boil, stirring until dissolved. Remove from heat and cool slightly.
- Pour warm brine over cucumbers, completely covering them and leaving ½ inch headspace.
- Remove air bubbles with a butter knife.
- Cool to room temperature, then cover and refrigerate for at least 24 hours before serving.
Notes
- Use fresh, firm pickling cucumbers for the best crunch.
- Always trim the blossom end – it helps keep pickles crisp.
- For extra crunch, add a grape leaf or oak leaf to the jar.
- Let pickles sit for at least 24 hours before serving for the best flavor.
- Store in the refrigerator for up to 1 month.
Nutrition (per ¼ cup)
Calories: 5‑10 | Protein: 0g | Carbs: 1‑2g | Fat: 0g | Fiber: 0‑1g | Sugar: 0‑1g | Sodium: 300‑500mg